REVIEW · KUALA LUMPUR
Malaysian Batik Experience-Handkerchief
Book on Viator →Operated by JADI BATEK · Bookable on Viator
Wax, dye, and a design you keep. In a downtown Kuala Lumpur studio, you get hands-on Malaysian batik guidance from start to finish, using the classic canting wax tool. It’s a creative break from sightseeing that ends with a wearable souvenir.
Two things I really like: the process is explained step by step, so you’re not stuck guessing, and you get to pick a take-home design from ready templates and color options. One consideration: if you choose the handkerchief option, you may need to wait 4 hours or return the next day for drying and finishing.
In This Review
- Key highlights you’ll care about
- Entering Jadi Batek Gallery in Imbi (where the class starts)
- What the 2-hour batik flow looks like (and what you’ll do)
- Sketching first: templates, colors, and design confidence
- The canting wax step: where the magic (and patience) happens
- Coloring and dye mixing: turning lines into your final design
- Drying time and the handkerchief option: plan your schedule
- Price and what $17 buys you (including GST and supplies)
- Who should book this batik class (and who might reconsider)
- Tips to get the best results from your batik
- Should you book this Malaysian batik experience?
- FAQ
- Do I need any experience to make batik?
- How long does the batik experience take?
- What do I get for the $17 price?
- Can I make this as a handkerchief?
- Are there any optional add-ons?
- Can I cancel for free?
Key highlights you’ll care about
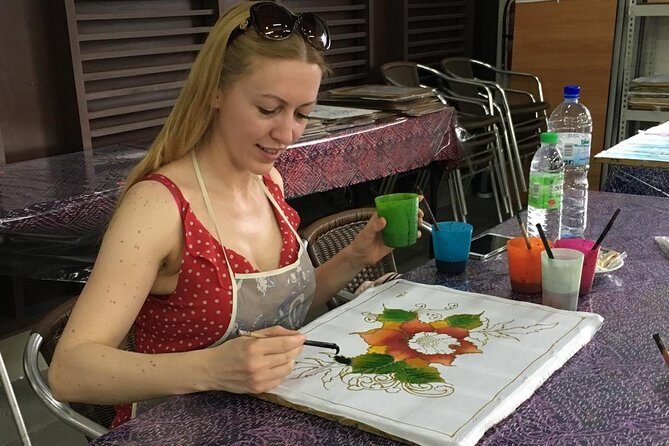
- Canting wax tool practice with hands-on instruction throughout
- Pick your own scarf or handkerchief design using provided templates and colors
- Easy-to-follow steps: sketch → wax → color → dry
- Included tools, materials, water, and snacks so you’re not tracking extras
- Made in a cool, workshop-like studio atmosphere (you’ll see how batik gets drawn and handled)
- Optional add-ons like edge sewing and courier delivery
Entering Jadi Batek Gallery in Imbi (where the class starts)
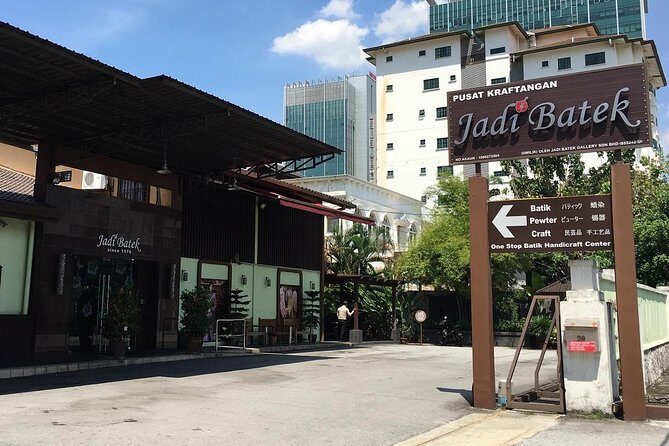
Your batik experience begins at Jadi Batek, a studio in the Imbi area of Kuala Lumpur, at 30 Jalan Inai. It’s the kind of meeting spot where you can show up with minimal fuss: you’ll use a mobile ticket, and the activity ends back where you started. There’s also a convenient public-transport setup, which matters in Kuala Lumpur where traffic can turn a short ride into a long day.
Inside, the pace feels practical. First, you get introduced to what batik is and how the traditional method works, then you move quickly into the steps that matter for making your own piece. You’re not asked to be an artist before you arrive. The studio setup is designed for real participation, meaning you’ll be guided while still doing the work yourself.
The setting also helps. Several participants highlight that the studio stays comfortable, with enough space to watch others making batik while you’re learning. If you’re traveling with a friend or family member, this is one of those activities where you can chat and compare choices without the class turning chaotic.
You can also read our reviews of more tours and experiences in Kuala Lumpur.



What the 2-hour batik flow looks like (and what you’ll do)
This is an approx. 2-hour experience, private for your group. That private setup is a big deal because you’re not stuck waiting for a crowded schedule or watching someone else’s process from afar. The format is also clear: one stop, one workshop, one finished keepsake (or a timed return if you pick the handkerchief route).
Here’s the rhythm you should expect:
1) Orientation and batik basics
You’ll start with a short introduction to batik and the classic process used on fabric. You’ll learn the idea behind the wax-resist method—why hot wax matters, and how that affects the final lines and patterns.
2) Sketch your scarf design (or choose a template)
Next, you’ll sketch your batik scarf design. You’ll get inspiration and templates, which is helpful if you’re unsure what to draw. If you want to take a more freestyle approach, the studio also supports that style—some groups choose to draw their own pattern rather than using a pre-drawn template.
3) Apply hot wax using the canting
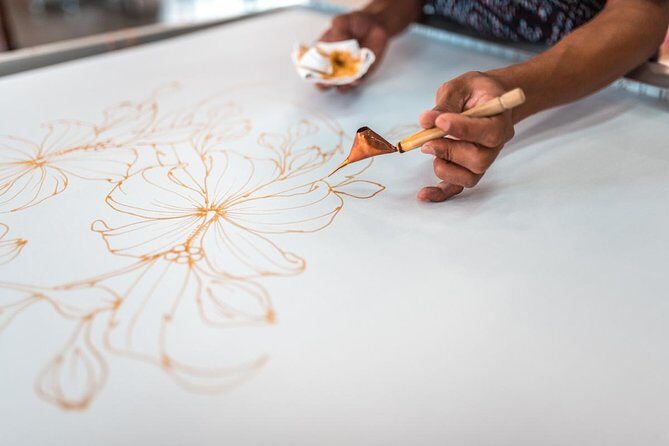
Once your sketch is ready, you use the traditional tool called the canting to apply hot wax along your motif. This part is the signature moment. The instruction is meant to get you functioning fast, even if you’ve never touched a wax tool before.
4) Color with batik dyes
After waxing, you paint with the workshop’s fabric dyes. You can paint your fabric using the available dyes, and you may even mix custom colors to get the look you want. This is where the design becomes yours—pattern gives you the structure, color gives you personality.
5) Drying and take-home prep
After the painting and drawing part, the activity portion wraps up with drying. The team dries your fabric quickly so you can take it home. If you choose the handkerchief option (or if you want a more fully finished result), the studio may keep it longer and you’ll collect after additional drying time.
The class is set up so even a first timer leaves feeling proud of the outcome.
Sketching first: templates, colors, and design confidence
Your design stage is where most people either relax or panic. The good news: the studio gives you both structure and freedom.
You’ll start by sketching your batik scarf design. If you don’t have a clear idea, templates do the heavy lifting. You can pick from multiple motif options, and you’ll have color choices available in the workshop. That means you’re not starting from a blank page. It’s a much better way to learn because you can focus on the process—waxing and coloring—rather than getting stuck on creativity.
If you want to be more hands-on with your own idea, some people choose the option to freely draw their own patterns instead of picking a template. In that case, the key is to keep your motif simple enough to translate cleanly through wax lines and dye work.
One small but important practical note: batik rewards steady hands. The instruction helps, but the process still asks you to slow down. If you’re the type who wants instant results, think of this as a calm activity where you trade speed for control.
Also, I like that you can make choices that stay tied to you after the class ends. Template + your colors means you get a take-home souvenir that looks intentional, not generic.
The canting wax step: where the magic (and patience) happens
The most defining part of the workshop is applying wax with the canting. In batik, wax works like a resist: it blocks dye from taking certain parts of your fabric. That’s why your wax lines matter—clean placement leads to cleaner pattern boundaries.
Expect a guided introduction before you start. The team shows you how to handle the tool, how to apply wax along your motif, and what to watch for as you go. The goal is not perfection on the first try. It’s learning the technique so you can complete your design confidently.
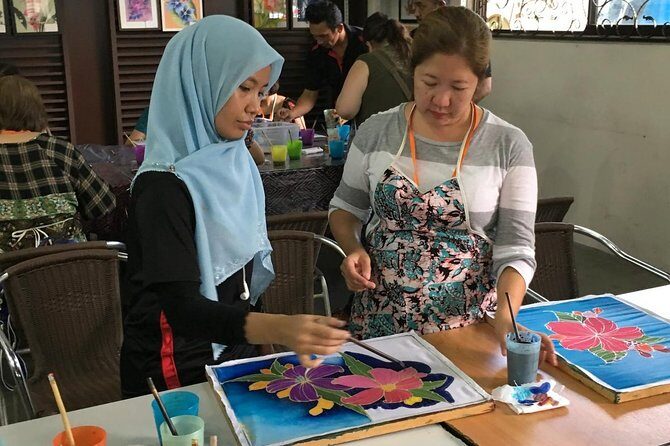
If you’ve got a nervous streak about craft work, this is the place where the staff’s role becomes obvious. Many participants mention the instructors being kind, helpful, and clear with directions. One named example: Ms. Carol is highlighted for being supportive and good at guiding people through the process. That kind of attention helps you avoid the most common beginner mistake—rushing the wax work.
You’ll also likely see others working or being assisted in a shared workshop space. That’s useful because it helps you understand that even different designs follow the same basic logic. Once you get the wax technique, coloring makes more sense.
Coloring and dye mixing: turning lines into your final design
After waxing, you move into the fun part: coloring with batik dyes. You can paint your fabric using the dye options available in the workshop. If you want to go beyond the default palette, you can mix custom colors. That’s where your piece stops looking like a class project and starts looking like your style.
Color application is also a lesson in restraint. Too much force or too much dye too quickly can make edges blur. The studio’s instruction keeps you moving at a pace that gives the dyes time to do their job.
This is also one of the reasons the workshop feels good on a hot day. It’s hands-on, creative, and usually calmer than you’d expect from a tourist activity. Several people call it relaxing and therapeutic, which is believable once you’re working through repeated steps—wax lines, then brush strokes.
When the colors finally show through and you see the resist effect, it’s a real payoff moment.



Drying time and the handkerchief option: plan your schedule
Here’s the practical part you’ll want to plan around: the take-home timing depends on what you choose.
If you make your item with the standard class flow, drying is done quickly so you can take it home. But there’s a clear alternative: you can make the batik as a handkerchief. If you choose that route, you’ll need to wait 4 hours or come back the next day to collect the finished artwork.
A separate note from the real-world experience of the class: if you want a fully finished look that requires additional drying and prep, keeping your work overnight may be needed. That’s not a problem if you’re staying in Kuala Lumpur and can return, but it is a scheduling factor.
So the best approach is simple:
- If you want to walk out with your piece the same day, choose the option that matches same-session drying.
- If you’re fine with a return, the handkerchief choice can be a great way to add a useful, practical keepsake to your trip.
Either way, you’re taking home something you made yourself—wax-resist batik isn’t something most people get to try in their travels.
Price and what $17 buys you (including GST and supplies)
At $17.00 per person, this batik experience is priced like a true workshop, not just a craft souvenir stop. The value comes from three things you don’t have to hunt down yourself:
- Tools and materials are included
- GST is included
- Bottled water and snacks are included
You’re also getting instruction for the actual method: sketching, using the canting wax tool, and painting with batik dyes. That’s the difference between buying a finished batik item and learning the process that creates it.
What’s not included is transportation to and from attractions. So budget for a normal ride across Kuala Lumpur, or build it into a day that already has stops in the Imbi area.
There are also optional add-ons if you want your piece to be more finished or more convenient:
- Sewing the edge of the batik (extra charge of RM10)
- Courier service to your home (fees depend on location)
Think of these as upgrades. The base experience still gets you a finished takeaway based on how long you’re willing to wait for drying.
Who should book this batik class (and who might reconsider)
This is one of the better Kuala Lumpur activities if you want something that’s hands-on but not stressful. It suits people who like making decisions—design templates, color mixing, and choosing a pattern you’ll actually want to keep.
It’s also a solid pick if you’re traveling with family. The workshop format works well for younger participants too, as long as they can follow instructions and handle the wax tool area safely with staff guidance. If you’re traveling with someone who loves art but fears complicated steps, this class gives you structure and support.
Who might reconsider? If you have zero patience for any wait time and you absolutely need a handkerchief finished and ready the same day, you should double-check which product format you choose. The drying schedule is the main constraint.
Tips to get the best results from your batik
You don’t need special skills, but you’ll get better results if you come in with a little strategy.
- Take your time on the wax step. Clean wax placement matters more than fast painting.
- Choose a motif you can execute in your time window. Templates help for a reason.
- If you want custom colors, use that time deliberately. Mixing should support your design, not replace it.
- Plan for drying. If handkerchief timing matters to your itinerary, align your collection plan from the start.
- Bring your patience. The process is more satisfying when you treat it like a calm craft session, not a race.
And if you’re worried about looking like you know what you’re doing, here’s the good part: the studio guides you through it, and people leave feeling like they could do another one.
Should you book this Malaysian batik experience?
If you want a memorable Kuala Lumpur souvenir that doesn’t feel generic, I’d book this. You’re not just buying batik—you’re learning the method with the real canting wax tool, choosing a design, and painting your own colors. For the price, the included materials, GST, and even the snacks make it feel like a complete workshop.
The only reason to hesitate is timing. If you pick the handkerchief option, plan on the extra wait or a next-day return. If you can work with that, this is exactly the kind of activity that turns a travel day into something you’ll still remember when you open your suitcase.
FAQ
Do I need any experience to make batik?
No. You get a guide on hand from start to finish, including explanations of the history and traditional process, plus hands-on instruction while you sketch, wax, paint, and finish your piece.
How long does the batik experience take?
The class is about 2 hours (approx.) for the main activity. Drying is handled by the team afterward, but handkerchief options may require extra waiting time.
What do I get for the $17 price?
Tools, materials, GST, bottled water, and snacks are included. You also get help choosing and making a design from available templates and color options.
Can I make this as a handkerchief?
Yes. If you choose the batik as a handkerchief, you need to wait about 4 hours or come back the next day to collect the final piece.
Are there any optional add-ons?
Yes. You can add sewing the edge of the batik for RM10, and you can also arrange courier service with fees depending on your location.
Can I cancel for free?
Yes, free cancellation is available if you cancel at least 24 hours before the experience starts. If you cancel less than 24 hours before, the amount paid isn’t refunded.